
After you have created a few invoices with the Invoice Generator, you will notice there is quite a bit of room to customise how your invoices look and behave. These tips cover the settings that make the biggest difference in day-to-day use.
If you are new to the tool, start with the setup guide and the invoice creation guide first.
Tip 1 — Logo versus company name: choosing what appears in your invoice header
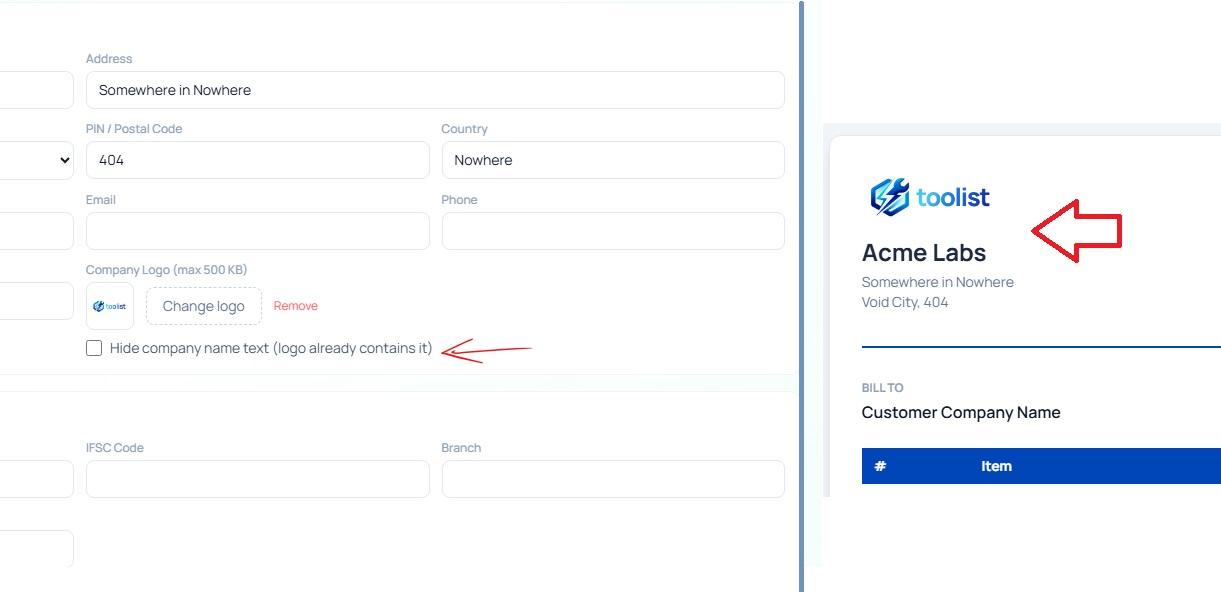
The invoice header can show your company logo, your company name as text, or both. There is an option in the business profile settings that lets you hide the business name when a logo is present.
When to hide the text name:
- Your logo already includes your company name as part of the design. Showing the text name alongside it creates duplication.
- Your logo is clean and professional at small sizes. Let it do the work.
When to keep the text name visible:
- Your logo is a symbol or icon without a readable name
- You want the company name to appear clearly in the header for formal documents
The setting is a toggle in the Business Profile section: "Hide company name if logo present". Enable it if your logo is self-contained.
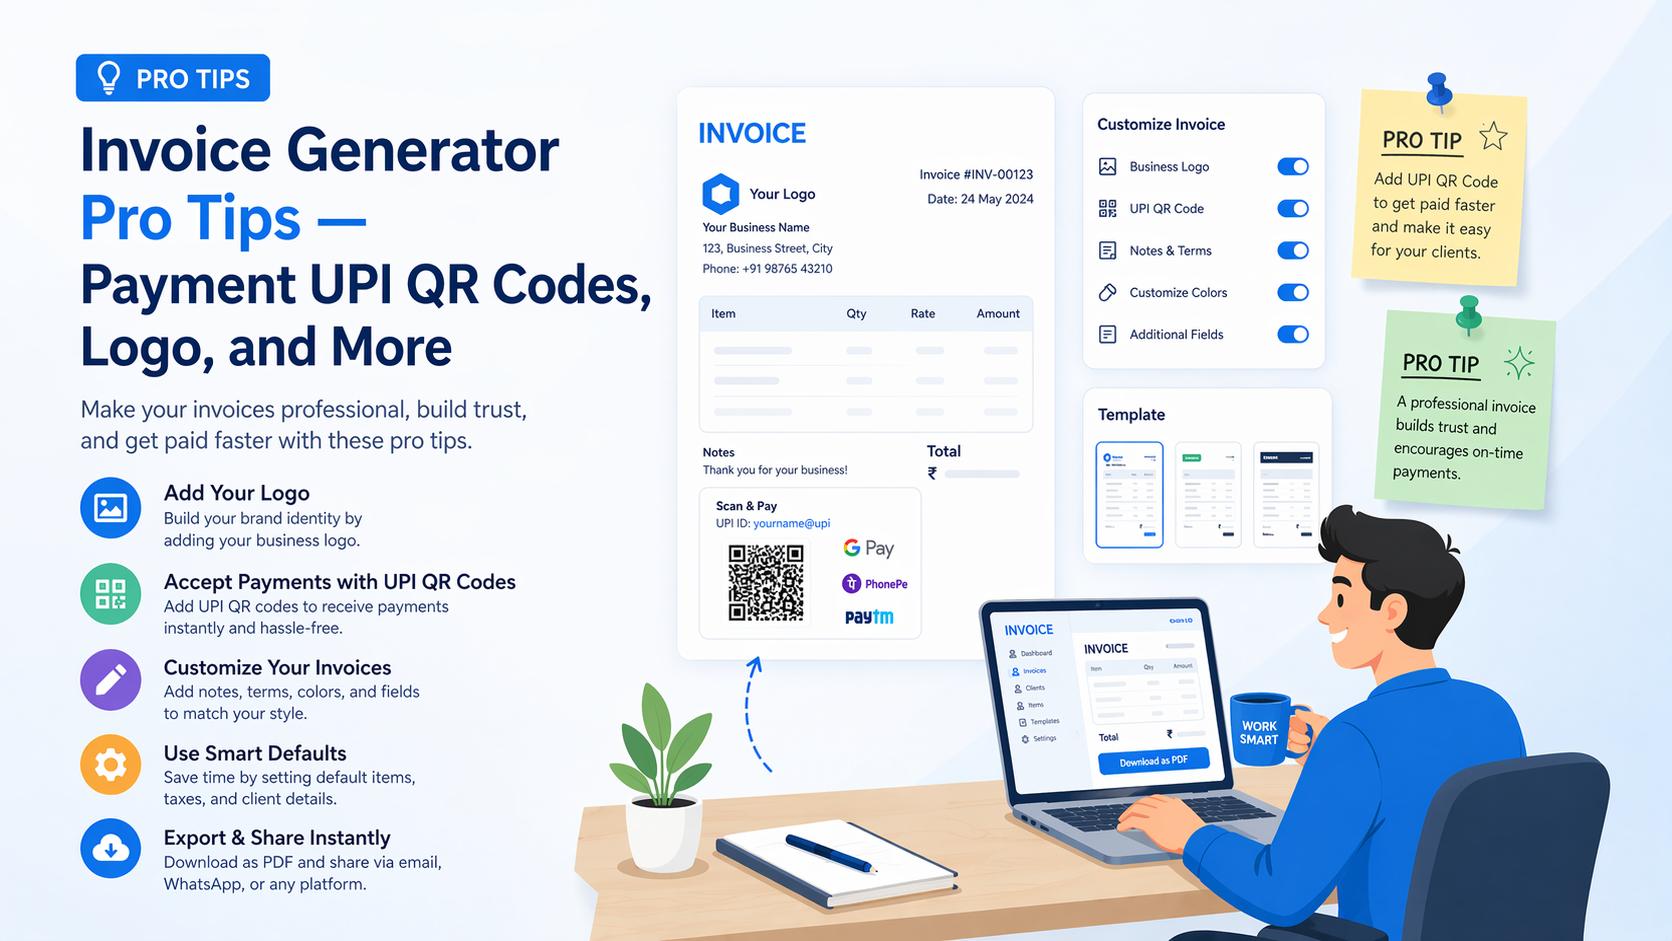
Tip 2 — Set up the payment QR code once, and it appears automatically
If you accept UPI payments (Google Pay, PhonePe, Paytm, BHIM, or any UPI app), adding your UPI ID to the business profile unlocks one of the most useful features of the tool.
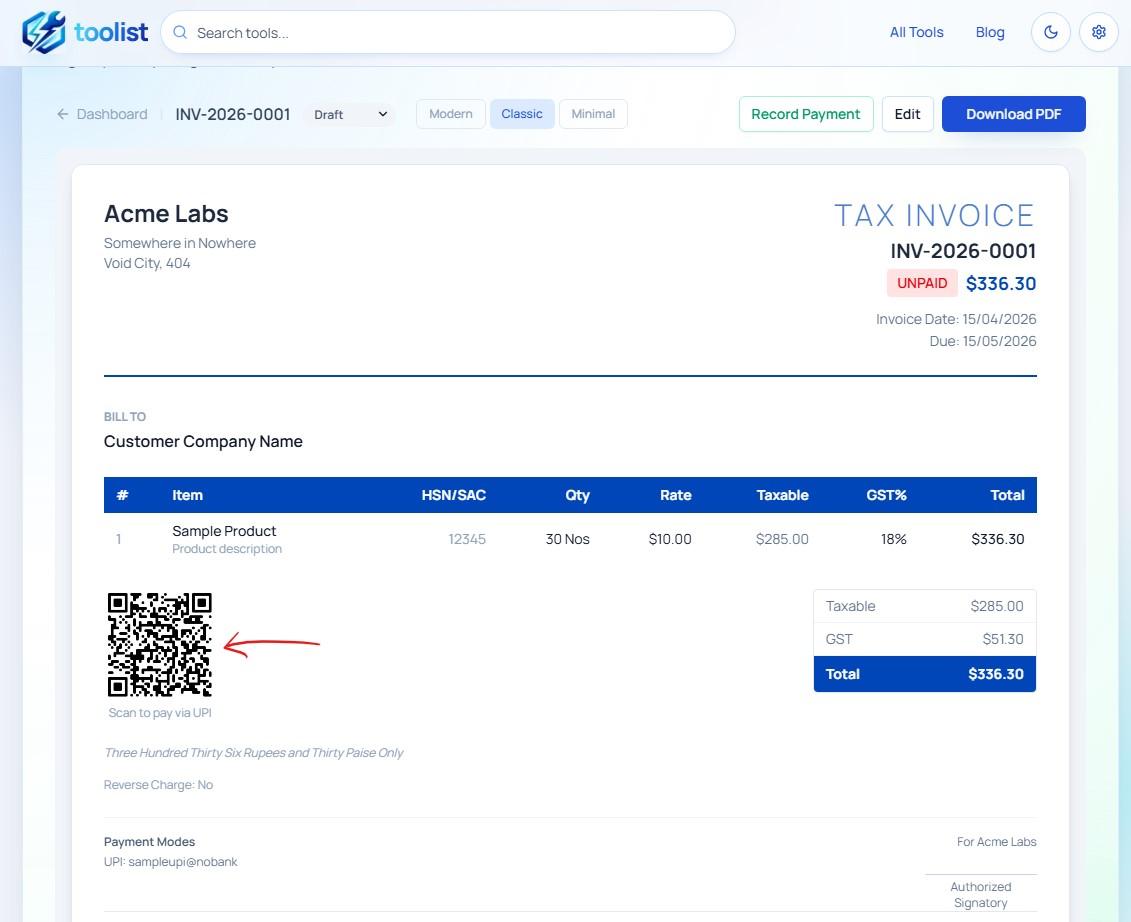
On any unpaid invoice, the tool automatically generates a QR code that encodes:
- Your UPI ID
- Your business name
- The exact invoice amount
- The invoice number as a transaction note
Your client scans the QR with their UPI app, the amount and your UPI ID are pre-filled, they enter their PIN, and you get paid. No payment gateway, no transaction fee, no extra steps for either side.
The QR disappears automatically once you mark the invoice as paid — it does not appear on paid invoices.
To enable it:
- Go to Business Profile and enter your UPI ID in the bank and payment section
- In the invoice preview settings, make sure "Include payment QR on unpaid invoices" is turned on
That is the entire setup. Every new invoice will include the QR code in both the on-screen preview and the downloaded PDF.
Tip 3 — The paid status badge and when to show it
The invoice PDF can show a status badge — a stamp-style mark that shows whether the invoice is Draft, Sent, Paid, or Cancelled.
This is useful when:
- You want to send a copy of a paid invoice to a client for their records with the Paid mark clearly visible
- You manage invoice copies internally and want the status visible on the document itself
If you do not want the status mark to appear on every invoice — for example, when sending a fresh invoice to a client before payment — you can toggle it off in the preview settings using "Show invoice status badge".
Set your preferred default in the tool settings so you do not have to change it each time.
Tip 4 — The authorized signatory section
Some formal invoices — especially for B2B supplies, government vendors, or contractual billing — require a signature block at the bottom. The invoice tool includes an authorized signatory section that you can toggle on or off.
When turned on, the PDF shows a space for a signature, with "Authorized Signatory" as the label. It is positioned in the lower-right area of the document, consistent with standard invoice formats.
Toggle it from the preview settings using "Show authorized signatory". If you use it on most invoices, set it as the default in the tool's app settings so it is always included without any extra steps.
Tip 5 — Set default terms so you do not retype them every invoice
If you have standard payment terms that appear on most of your invoices — things like payment due date, late fee policy, return conditions, or a general disclaimer — you can set them once and stop retyping.
In the Business Profile (accessible from the setup wizard or the Business Profile section in the tool), there is a Default Terms and Conditions field. Whatever you enter here is automatically pre-filled in the terms section on every new invoice.
You can still edit the terms on a specific invoice if that particular deal has different conditions. The default just saves you from starting from scratch each time.
Good default terms to consider:
- "Payment due within 15 days of invoice date"
- "Please pay by NEFT/IMPS or UPI to avoid delays"
- "Goods once sold will not be taken back"
- "For billing queries, contact accounts@yourbusiness.com"
Tip 6 — Customise your invoice number format
The default format INV-{YYYY}-{NNNN} produces invoice numbers like INV-2026-0001. But many businesses have their own preferred formats.

The format builder uses tokens you can combine freely:
Token & What it produces
{PREFIX}| Your custom prefix (e.g., INV, BILL, TAX){YYYY}| Full 4-digit year (2026){YY}| 2-digit year (26){MM}| 2-digit month (04){NNNN}| 4-digit padded running number (0001){NNN}| 3-digit padded number (001){N}| Unpadded number (1)
Common formats businesses use:
INV/{YYYY}/{NNNN}→INV/2026/0001{PREFIX}/{MM}{YY}/{NNN}→INV/0426/001TAX-{NNNN}→TAX-0001
Each document type has its own sequence. Invoices, proformas, and estimates each have separate running numbers and can have separate prefix formats. So your invoices can be INV-0001 while your estimates are EST-0001.
You can also set the auto-reset option to reset the running number at the start of each month or each financial year — useful for businesses that want to restart from 001 each April.
Tip 7 — The round-off toggle for clean totals
GST calculations sometimes produce totals like ₹4,218.46. Many businesses prefer to round this to ₹4,218 on the invoice. The round-off toggle in the invoice builder does exactly this.
When enabled:
- The grand total is rounded to the nearest rupee (or nearest whole unit in other currencies)
- A small positive or negative round-off adjustment line appears in the totals section
- The amount in words also reflects the rounded amount
This is commonly used in retail and B2C invoicing where the customer pays a whole-number amount. For B2B invoices where clients need exact figures for their own GST input credit, you may prefer to keep it off.
Tip 8 — Export to Excel for GST filing
When GST filing time comes around, the tool's Excel export on the dashboard gives you a structured two-sheet workbook:
- Invoices sheet — a summary row per invoice with customer details, GST breakdown (CGST, SGST, IGST separately), and totals
- Line Items sheet — a detail row per line item with HSN codes, quantities, rates, discount percentages, GST amounts, and line totals
This export is useful as a reference when preparing your GSTR-1 or working with your accountant. Download it from the Export Excel button on the dashboard. You can also filter by date range on the dashboard before exporting to get only the invoices for a specific month or quarter.
Putting these tips together
The full potential of the invoice tool shows when these settings are configured once and left to work in the background:
- UPI QR code appears automatically on every unpaid invoice
- Default terms are pre-filled on every invoice without any manual work
- Invoice numbers generate in the right format without manual input
- Your logo appears cleanly in the header without duplicating the company name
- The authorized signatory section is present on invoices that need it
- The status badge shows Paid when you send a receipt copy to a client
The result is a professional invoice that is ready to download in under a minute, with all the details your client needs to make a payment — and all the information you need to track it.
Open the Invoice Generator and explore the settings to get your ideal setup in place.